Tuesday, October 30, 2012

Lightbox Tutorial


This is a project I did for Mia earlier this year but I'm posting instructions so my sweet friend can understand my rambling :)

Anyway, I wanted something like this light box for Mia without the $200 pricetag (as an aside, there are actually some good deals on Amazon right now...it might be easier to purchase one now than make one...at the time I made this they were all $150+). That said, here's how I made ours (for around $25)...

Supplies


- Plastic container. You can use any translucent container but keep in mind that it shouldn't be too tall (otherwise the light won't be very strong) and is big enough to hold your light source. Ours is about 6 inches high. Also, be sure to look at the BOTTOM of the container, since this will serve as the top of the lightbox. Be sure you can live with any weird logos or ridges :) Ours has a raised ridge all the way around the edge but it is fine (and keeps things in place).


- Metallic/Shiny Spray Paint  The idea is that the paint will reflect the light back to the top of the light box. You could also probably get away with using aluminum foil or flashing instead. You may want to use Plastic Fusion but it isn't a must (I didn't...the store didn't have it and I was impatient to make the lightbox). If you only can find a clear plastic container, spray it first with glass frosting spray paint so the light can be diffused.


- Battery operated lights I love these ones because they have a remote control button you can stick on the side. I only used one and it works well (two might be even better, I'm just a cheapskate ;)

All you have to do is:
1. Spray paint the SIDES (not bottom) of the box with the metallic spray paint. Spray the bottom of the box with glass frosting spray if needed. Let dry.
2.  Affix the light strip to the top of the the box.  Stick the remote button on the side to serve as an on/off switch.
3. Gather up fun stuff to use on the light box! Marbles, plastic ice cubes, shot glasses.... :)


More ideas for light table fun:

Laminated tissue paper, leaves and toys from StrongStart

Colored Epsom Salt recipe from Watch Me Play and Learn

Color paddles, glitter sticky hands, and transparent blocks at Oriental Trading

Friday, October 12, 2012

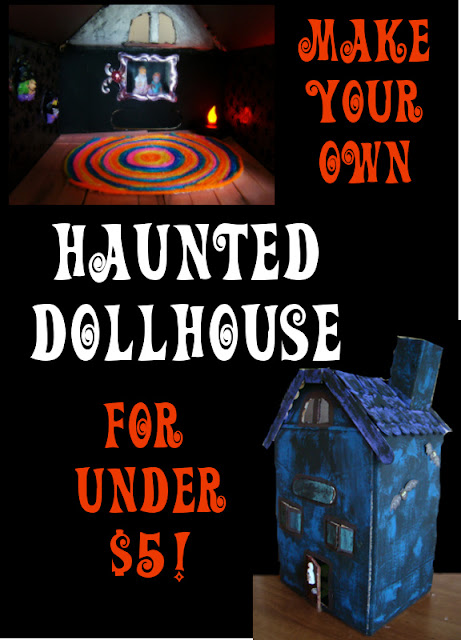
Haunted Dollhouse on the Cheap!

I was making a Halloween sensory bin for Mia and didn't like how it was turning out...it needed something...a haunted house! Since I don't own one, I decided to throw one together out of a cardboard wipes box. As usual, I got carried away and in the end probably had just as much fun making it as Mia will playing with it!


Supplies
  • Cardboard box (freesies!)
  • Hot glue (on hand, of course!)
  • Popsicle Sticks (I had them on hand but I calculated it out to be about 50 sticks costing around .80)
  • Acrylic Paint (I just used the cheap stuff I had on hand from a sale at Michaels...so approx $2 in paint to buy them for the project. I used black, purple and blue).
  • Embellishments  (Here the cost will vary depending on what you want to include and what you have on hand. I factored in half of the budget, around $2.50 for this so you can go crazy. Lol). Here's what I did:
    • Stuff I had around: yarn, stickers, fabric scraps, Halloween scrapbook paper from last year
    • Stuff I splurged on: Halloween ornaments ($1 at Michaels) & Frame stickers ($1.50 at Michaels)...everything Halloween was 50% this week :)

How-To

1) Pick a box, any box. Corrugated is stronger. Taller is spookier.


2) Cut the box in half.


3) Cut the roof. You can use a ruler but I just eyeballed it because it's a haunted house and everyone knows ghosts hate symmetry. :-)


4) Mark and cut windows and door in box. Again, I just freehanded it since the house is supposed to look like its in disrepair. :-)


5) From the other half of the box, cut a square that fits snugly within the box you have just cut your door and windows into. This piece will be the floor/ceiling of the two rooms. Hot glue the piece in place.

6) Fold the sides of the box in to the roof edges you cut. Hot glue them in place.


7) Make a chimney by cutting off one of the top flaps from the box section that isn't becoming the house and marking four lines about 1 inch apart. Fold along the lines. Before gluing, cut a slant in the bottom of the chimney. This is where it will sit flat against the roof. Hot glue the chimney edges together and then to the roof of the house.


8) Add popsicle sticks for the roof. Glue single sticks to the roof. Cut the edges off some with regular craft scissors and layer them on top of the long sticks to create a tiled effect.

Now...Decorate! You can do so much with these rooms. Here's what I did:

  • I used the left over centers of popsicle sticks (from making the tiles in the roof) to make a hard wood floor. I stained it with black acrylic paint watered down.
  • I made a yarn rug by cutting cardstock in an oval and hot gluing yarn in concentric circles onto the cardstock.
  • I glued some spider scrapbook paper to the walls and ghost scrapbook paper to one of the ceilings. I cut some into "tiles" for the first floor. 
  • I slid fabric scraps onto a toothpick and hot glued the toothpick over the windows to create a curtain rod and curtains.
  • Hot glued the Halloween ornaments to door, and walls.
  • I found these terrific stickers that look like frames. I asked Mia if I should put ghosts or monsters in them and she said..."how 'bout Mia?" I thought that sounded like a great idea! So, I had the girls put on the silly headbands we found at the Target dollar bins and snapped a few pics. Printed them out on my computer to the frame size and now they are part of the house's decorations! (I think that is by far my favorite part of the whole house!!)


Happy Haunting!


Follow Me on Pinterest


Saturday, October 6, 2012

Bathtub Art


About nine months ago, I made Mia some bath paints and was so excited to do them with her. Unfortunately, it was such a bust! Because of her SPD (which we didn't really know about at the time), she flipped out. She began to paint - which she loves to do - but then started panicking and crying. I can't be sure but I suspect she didn't like the sensation once she touched the paints and then panicked because she felt trapped in the tub and couldn't get away from that feeling.

Fast forward to the other day when we were cooped up inside on a rainy day and looking for something fun to do. I decided to muster up my courage and give bathtub paints another try.  I was hopeful since Mia has been making great strides since starting OT and I also figured I could always - literally - pull the plug if it got to be too much. Luckily, she had a BALL!

We made the paints together before hand and this time I used an ice cube tray to hold the paints. I love this recipe and the best part is, because it's made of soap once we're done the bath is cleaner than when we started!


Thursday, September 27, 2012

Robots!

This month we have been enjoying playing with our robot sensory bin. I got some clear beads for playing with but they weren't enough to cover the bottom of the bin. I didn't want to spend any more money on them (being the big cheapskate I am) so, I decided to get shiny, metallic foam sheets (.50/each)to cover the bottom & then put the beads on top. I'm pleased with how it turned out and Mia loves it!

 In the bin: 
Foam star stickers ($5 but will reuse in other projects), Letter beads ($1), Clear pony beads ($4), Foam sheets ($2) Pasta we dyed with rubbing alcohol & food coloring (free), Robots ($1, Michael's). Total cost: $13.

Wednesday, September 5, 2012

The Riddler

I've been making some fun stuff but haven't uploaded pics...so that will be for another post. Instead, I wanted to write about an epiphany I had yesterday. I used to do crossword & sudoku puzzles. Now I keep mentally sharp by trying to figure out what on earth my child is talking about. Mia has a knack for never answering a question directly. As it turns out, I actually live with The Riddler.

Here is a conversation I had with my three year old yesterday:

M: I'm hungryyyyyy.
Me: Ok, would you like some toast? or a bagel?
M: I want humthin else.
Me: Ok. What?
M: Humthin Daddy give me yessaday.
Me: Ok. What is it?
M: A special treat.
Me: A treat? For breakfast? Like an apple juice?
M: No, a FOOD.  Daddy give me yessaday!
Me: I don't know what Daddy gave you. What is it called?
M: Humthin you hold and then you eat.....You put it on a plate.

**At this point I gave up and texted Charlie. If you guessed it was a popsicle you are both correct and insane.**

Or...

M: May I watch a movie please?
Me: Sure. What do you want to watch?
M: Humthin I seen afore.
Me: What's it called?
M: It's a short one.
Me: What is it's name?
M: On the 'puter. Humthin I seen afore.

**resisting urge to bang my head against the wall**

Or...

M: I wanna do humthin.
Me: Ok. Let's do a puzzle.
M: No. Humthin special.
Me: Hmmm. Alright. You want to paint?
M: No! Humthin special!!
Me: (Silent)
M: I wanna do humthin special.
Me: (It is clear to me at this point that she has something particular in mind). Sigh...can't you just tell me what it is?
M: Humthin. Special.
Me: Yes, I heard that. I don't know what you're talking about.
M: I'm talking about in your closet.
Me: You want playdough? (the only "humthin" to play with in there)
M: Sure! That's a good idea!


Tuesday, July 10, 2012

DIY Yo-Yo Maker Tutorial


Staying true to my word, I went to a craft night last night to let off some steam (I'm a real wild woman). 

What a great time! One of the crafty ladies had a yo-yo maker (the fabric variety not the around-the-world-and-walk-the-dog kind). I have never been able to make a yo-yo. It seems easy and like something I should be able to do so I have attempted it several times.  No matter how I try, they always turn out wonky.  Anyway, after seeing this helpful yo-yo maker I decided to make my own (free one) from stuff around the house.  Here's how to do it:

Step 1. Decide to organize your craft space during the 15 minutes of harmony in the day when the 5 month old and 3 year old are both happy.


Step 2. Rip the label off an old formula can and use it to store paint brushes. 

Step 3. Notice how similar the formula can lid looks to a yo-yo maker and decide you could probably make one yourself.


Step 4. Go get some cardboard from the giant stash in the garage. Congratulate yourself that you are using it up just like you planned and your husband is totally wrong that you "have a problem." Retrieve a small piece of cardboard and carefully restack the tower of empty boxes back up to the ceiling.

Step 5. Trace the lid onto the cardboard and cut out. Trim it ever so slightly so it is just smaller than the lid. 


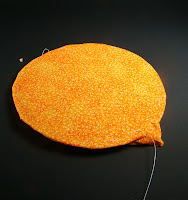
Step 6. Punch holes 1/4 inch apart through the cardboard and lid with an embroidery needle. IMPORTANT: Mark one of the holes and its corresponding spot on the lid (see pic) so you can line it up later as a guide. That way all the holes will line up nicely when you go to make your yo-yo's.


Step 7. Using an Exacto knife, cut a slit between every other hole. Cut slits from the hole to the edge in the cardboard circle (this is where the thread will pop out when you are done).

Step 8. Put a square of fabric in lid, wrong side up, and place cardboard inside.  Trim fabric so that it hangs over the holes in the cardboard circle.


Step 9. Tie a knot in your thread. Begin sewing by going down in hole A, up through hole B and fabric, down through fabric and hole C. Repeat until you go around the entire circle.


Step 10. Pop the lid and cardboard circle off the fabric. Pull thread taut until it makes the yo-yo shape (leave the string long if you are going to be adding a button, tie it off if not.

Now you can use the yo-yo maker over and over to make perfectly shaped yo-yo's! Or...you know...get back to the organizing...

Thursday, July 5, 2012

Heavy Thoughts and Blankets

So, I haven't posted in a while. Although we've still been doing fun and crafty things around here, it hasn't been as often and I haven't felt like posting. The last month I've been in survival-mode. Things have been really difficult with Mia, my three year old.

I am about 95% sure that she has Sensory Processing Disorder (SPD) (we are waiting for a more formal evaluation soon). Basically, it's a neurological condition where Mia either over-responds or under-responds to stimulus. So, the many many small sensations most people filter out everyday (sounds, smells, flourescent lighting, touches, etc), Mia cannot always make sense of and she consciously experiences every one (which tires her out very easily, so she needs more sleep than the average kid). What this means for Mia, and our family, is that every day tasks can be extremely difficult. It is hard to even express in words. Simple things like going to the grocery store or brushing her hair can illicit a fight or flight response. By the time we get to the check out line, she is usually moaning and crying (and I don't make long trips). As a parent, I struggle with keeping consistent rules and also being understanding that she is hitting me because having me touch her hair can be excruciating to her. I never know when or what will bother her - and I have to remember that neither does she (which makes for an emotional child sometimes).

Anyway, she was receiving OT services for a couple months (the main treatment for SPD) through an early intervention program but they discontinue when she turns three. The last month I've been on my own and trying to figure out what services are available where, how to access them and what they cost.  Going from finally getting an answer and some support to nothing at all has been so hard. Many people have no idea what its like.  Also, because Mia is such a sweetheart, it's especially hard for friends and family to imagine the challenges that goes along with her SPD day in and day out.

This last week has been better and we're on the road to getting another eval soon and hopefully more help.  And I'm also realizing that I need to be more attentive to my need to have breaks and be creative.

Here is the latest thing I've made (it helps with SPD among other things):

A weighted blanket.


Mia's therapist suggested a weighted blanket and in looking online for some, I realized they can be pricey. But, it seemed simple enough to make her one - so I did. It worked out even better because Mia is invested in it since she got to pick out the (clearance) fabric from the store for it and I got to use up some scraps too.

If you'd like to make one, here's how I did it:

First, I had to figure out how much it should weigh. The standard practice is 10% of the person's body weight, plus one pound. Then I figured out the yardage of fabric I'd need for the size blanket I wanted.  I bought plastic pellets from Micheal's, similar to these. They are kind of expensive (about $9 for 2lb), so each week I went with their 40 or 50% off one item coupon and bought one bag. They are better than using rocks or rice because they are washable and won't mold.

Next, I sewed the quilt top (you can just use one piece of fabric if you don't have a 3 year old that wants a ton of different fabric incorporated in :) and pinned it right-sides-together.  I sewed around the two pieces, leaving one short side open. Next, flip it inside out like a pillow case. I then sewed vertical lines every few inches across. Using a funnel, I added pellets a row at a time to the blanket, then sewed them up, added some more, then sewed across again, repeating until finished.  It was an easy project and it seems to help Mia calm down and transition to bed/nap better (when she will use it ;).