Staying true to my word, I went to a craft night last night to let off some steam (I'm a real wild woman).
What a great time! One of the crafty ladies had a yo-yo maker (the fabric variety not the around-the-world-and-walk-the-dog kind). I have never been able to make a yo-yo. It seems easy and like something I should be able to do so I have attempted it several times. No matter how I try, they always turn out wonky. Anyway, after seeing this helpful yo-yo maker I decided to make my own (free one) from stuff around the house. Here's how to do it:
Step 1. Decide to organize your craft space during the 15 minutes of harmony in the day when the 5 month old and 3 year old are both happy.
Step 2. Rip the label off an old formula can and use it to store paint brushes.
Step 3. Notice how similar the formula can lid looks to a yo-yo maker and decide you could probably make one yourself.
Step 4. Go get some cardboard from the giant stash in the garage. Congratulate yourself that you are using it up just like you planned and your husband is totally wrong that you "have a problem." Retrieve a small piece of cardboard and carefully restack the tower of empty boxes back up to the ceiling.
Step 5. Trace the lid onto the cardboard and cut out. Trim it ever so slightly so it is just smaller than the lid.
 Step 6. Punch holes 1/4 inch apart through the cardboard and lid with an embroidery needle. IMPORTANT: Mark one of the holes and its corresponding spot on the lid (see pic) so you can line it up later as a guide. That way all the holes will line up nicely when you go to make your yo-yo's.
Step 7. Using an Exacto knife, cut a slit between every other hole. Cut slits from the hole to the edge in the cardboard circle (this is where the thread will pop out when you are done).
Step 8. Put a square of fabric in lid, wrong side up, and place cardboard inside. Trim fabric so that it hangs over the holes in the cardboard circle.
Step 9. Tie a knot in your thread. Begin sewing by going down in hole A, up through hole B and fabric, down through fabric and hole C. Repeat until you go around the entire circle.

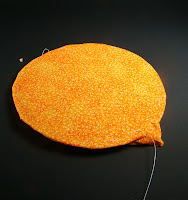
 Step 10. Pop the lid and cardboard circle off the fabric. Pull
thread taut until it makes the yo-yo shape (leave the string long if you
are going to be adding a button, tie it off if not.
Now you can use the yo-yo maker over and over to make perfectly shaped yo-yo's! Or...you know...get back to the organizing...


