Supplies
- Cardboard box (freesies!)
- Hot glue (on hand, of course!)
- Popsicle Sticks (I had them on hand but I calculated it out to be about 50 sticks costing around .80)
- Acrylic Paint (I just used the cheap stuff I had on hand from a sale at Michaels...so approx $2 in paint to buy them for the project. I used black, purple and blue).
- Embellishments (Here the cost will vary depending on what you want to include and what you have on hand. I factored in half of the budget, around $2.50 for this so you can go crazy. Lol). Here's what I did:
- Stuff I had around: yarn, stickers, fabric scraps, Halloween scrapbook paper from last year
- Stuff I splurged on: Halloween ornaments ($1 at Michaels) & Frame stickers ($1.50 at Michaels)...everything Halloween was 50% this week :)
How-To
1) Pick a box, any box. Corrugated is stronger. Taller is spookier.

2) Cut the box in half.

3) Cut the roof. You can use a ruler but I just eyeballed it because it's a haunted house and everyone knows ghosts hate symmetry. :-)

4) Mark and cut windows and door in box. Again, I just freehanded it since the house is supposed to look like its in disrepair. :-)
5) From the other half of the box, cut a square that fits snugly within the box you have just cut your door and windows into. This piece will be the floor/ceiling of the two rooms. Hot glue the piece in place.
6) Fold the sides of the box in to the roof edges you cut. Hot glue them in place.
7) Make a chimney by cutting off one of the top flaps from the box section that isn't becoming the house and marking four lines about 1 inch apart. Fold along the lines. Before gluing, cut a slant in the bottom of the chimney. This is where it will sit flat against the roof. Hot glue the chimney edges together and then to the roof of the house.
 8) Add popsicle sticks for the roof. Glue single sticks to the roof. Cut the edges off some with regular craft scissors and layer them on top of the long sticks to create a tiled effect.
Now...Decorate! You can do so much with these rooms. Here's what I did:
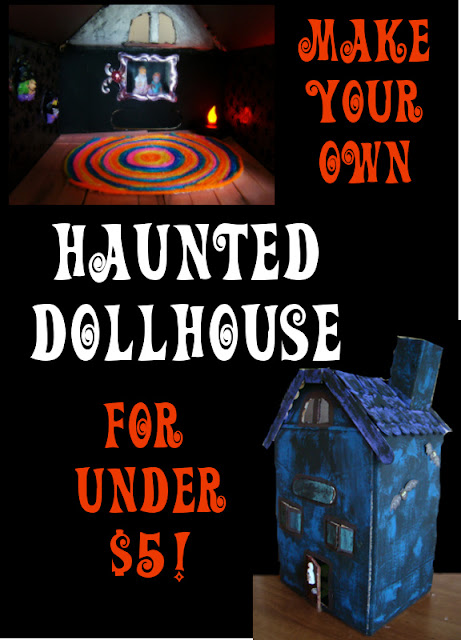
- I used the left over centers of popsicle sticks (from making the tiles in the roof) to make a hard wood floor. I stained it with black acrylic paint watered down.
- I made a yarn rug by cutting cardstock in an oval and hot gluing yarn in concentric circles onto the cardstock.
- I glued some spider scrapbook paper to the walls and ghost scrapbook paper to one of the ceilings. I cut some into "tiles" for the first floor.
- I slid fabric scraps onto a toothpick and hot glued the toothpick over the windows to create a curtain rod and curtains.
- Hot glued the Halloween ornaments to door, and walls.
- I found these terrific stickers that look like frames. I asked Mia if I should put ghosts or monsters in them and she said..."how 'bout Mia?" I thought that sounded like a great idea! So, I had the girls put on the silly headbands we found at the Target dollar bins and snapped a few pics. Printed them out on my computer to the frame size and now they are part of the house's decorations! (I think that is by far my favorite part of the whole house!!)
Happy Haunting!


This is so cool! I know Mia will love it.
ReplyDeleteI love it!!!! My boys would have so much fun making these! Thanks!
ReplyDelete